Table of Contents
Install an Identity Certificate for ASDM
When using some versions of Java, such as Version 7 update 51, the ASDM Launcher requires a trusted certificate. An easy approach to fulfill the certificate requirements is to generate a self-signed identity certificate and to configure the ASA to use it when establishing an SSL connection. After you generate the identity certificate and configure the ASA, you need to register it with the Java Control Panel on your computer.For the ASA 5506-X, 5508-X, or 5516-X with an ASA FirePOWER module, you can use ASDM for module management. In this case, you must create two identity certificates: one for the ASA and one for the module.Run the ASDM Identity Certificate Wizard (ASDM 7.3 and Later)
ASDM 7.3 and later provides the ASDM Identity Certificate Wizard. The wizard makes configuring self-signed identity certificates easy.
- When you first launch ASDM and do not have a trusted certificate, you are prompted to launch ASDM with Java Web Start; the certificate wizard then starts automatically.
- If you start ASDM yourself using Java Web Start, then you can launch the wizard from the Wizards menu.
- To generate the separate ASA FirePOWER module certificate, you must re-run the wizard to generate the additional certificate.
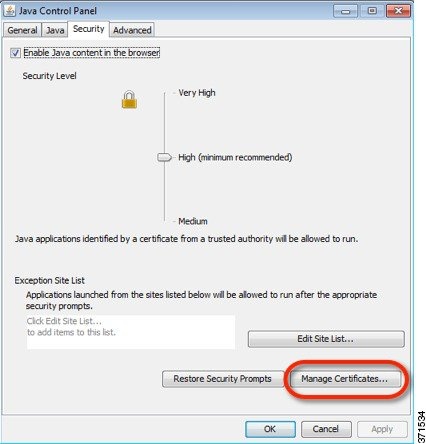
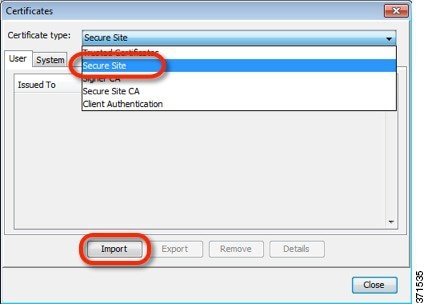
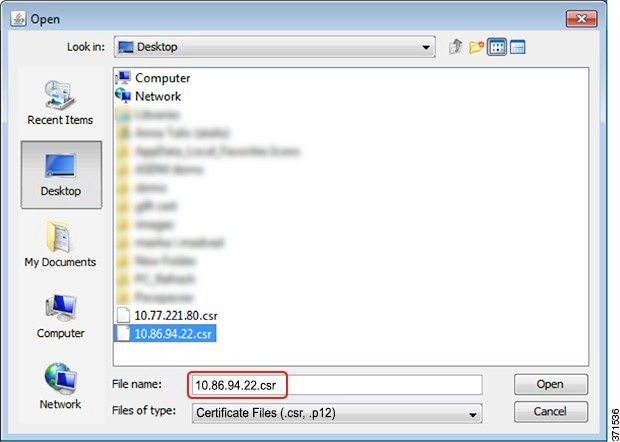
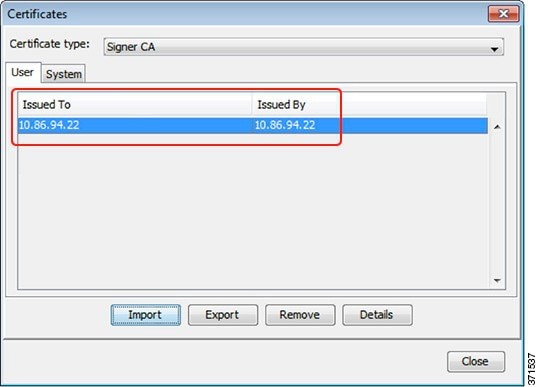
Register the New Identity Certificate(s) with Java
(ASDM 7.2 and Earlier) Manually Configure the ASA for an Identity Certificate
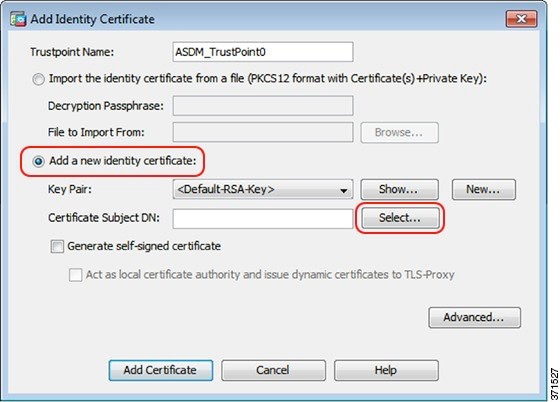
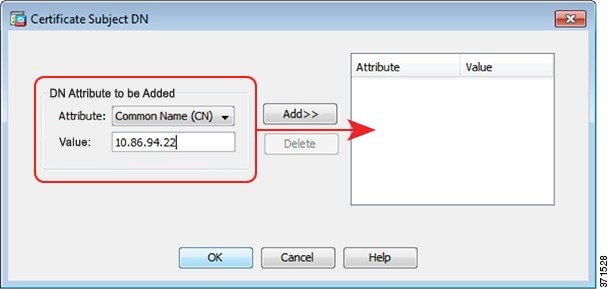
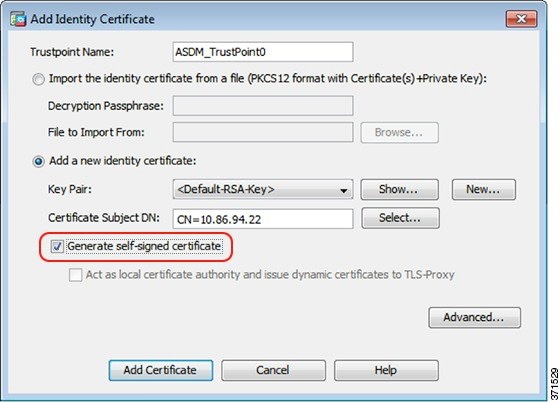
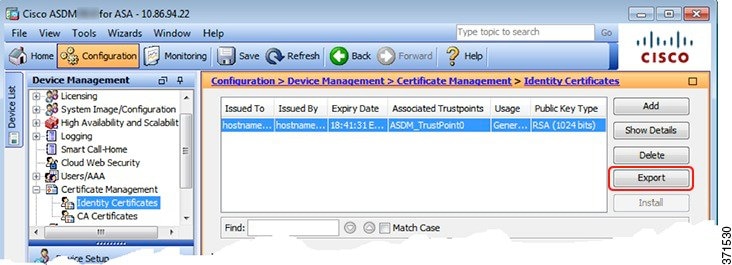
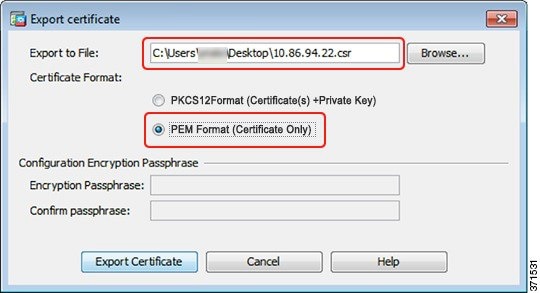
Create the Identity Certificate
Set the Certificate to Be Used with SSL
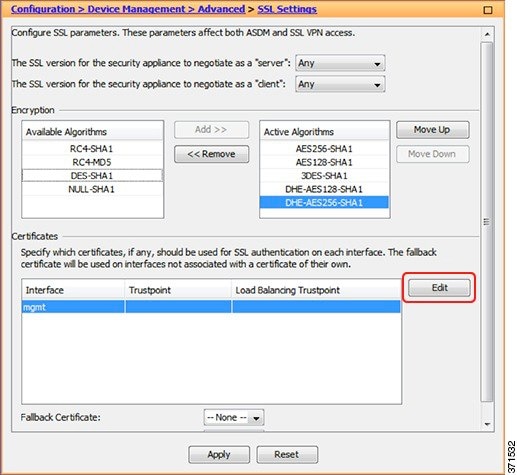
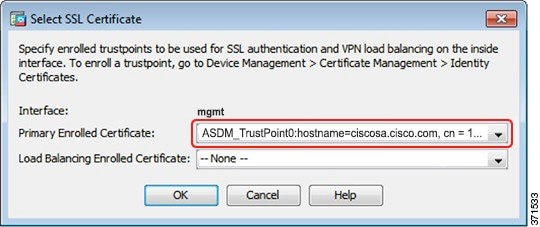
1.Choose Device Management > Advanced > SSL Settings. In the Certificates area, select the management interface entry, and click Edit.
Cisco and the Cisco logo are trademarks or registered trademarks of Cisco and/or its affiliates in the U.S. and other countries. To view a list of Cisco trademarks, go to this URL: www.cisco.com/go/trademarks. Third-party trademarks mentioned are the property of their respective owners. The use of the word partner does not imply a partnership relationship between Cisco and any other company. (1110R)
whaust
2017年6月19日 星期一
Install an Identity Certificate for ASDM
http://www.cisco.com/c/en/us/td/docs/security/asdm/identity-cert/cert-install.html
訂閱:
張貼留言 (Atom)
Popular
-
При планировании проекта разработки программного обеспечения я часто сталкиваюсь с помощником, который задает мне вопрос: в чем разница межд...
-
소프트웨어 개발 프로젝트를 계획 할 때 종종 어시스턴트가 질문을하는데 SA, SD, SE의 차이점은 무엇입니까? 이전에이 질문을 해본 적이 있는데 상당히 당혹 스럽습니다. 시스템 분석과 시스템 설계와 시스템 엔지니어링의 차이점은 무엇입니까? SA와...
-
Top 20 Threats Top 100 Threats --------------------------- NTP Amplification REQ_MON_GETLIST Request Found NTP Amplification Denia...


沒有留言:
張貼留言